Wednesday, June 26, 2019

white rectangular plate with caprese salad red tomatoes mozzarella balls green basil on a black table

The Fourth of July is next week, my friend. Next. Week. The summer that felt like it would never arrive is finally here and in full force. My tomato plants are thriving in the 80+ degree sunny days and warm nights we've gotten this week. They all got haircuts today to get that good airflow going, and they got their fourth round of ties, too!

two rows of tomato plants tied to bamboo stakes on a sunny day

This was my second year of starting my own tomatoes from seed. Last year, I had a horrible time deciding which seedlings to thin and instead kept and repotted them all, so I wound up with somewhere around 18 tomato plants. I was better about being heartless this year, and had only 10 coming up on transplanting time.

Well, then a funny thing happened...

I discovered Baker Creek Heirloom Seeds and had visions of a beautiful cutting flower garden. A hefty order of zinnias, balsam, and snapdragons later, I realized they included free mystery seeds with each order.

Don't you know they happened to be Purple Russian tomatoes?

Of course I had to try those too, so I popped a few seeds in a starter pot, which turned into two starts (I know, I'm supposed to be heartless but I just couldn't), so if you're counting, we're up to 12.

And then...

Have you ever heard of tomato suckers? They're the shoots that grow at a 45˚ angle from the "armpits" of the plant between the main stem and the arms. I single stake my plants, so these suckers get pruned. Well, those suckers grow fast, and if you're not paying attention or if you miss a few days of garden checks due to rain or whatever, those suckers may grow out of control. Don't worry, you can absolutely still prune them even if they get huge. And the best news? Stick them in a glass of water and they'll grow roots, then you can plant them! And I did just that. Twice.

14...

But don't worry, I'm absolutely done. I'm out of space. Well, until I pull my carrots... NO. STOP.

All that to say, caprese salad is my go-to quick and easy side dish that EVERYONE loves. It's the ultimate picnic side, full of juicy tomatoes that taste like pure summer. It takes no time at all to make (in fact, it's best if you wait to make it until right before it's served, because you are NOT allowed to refrigerate tomatoes), and you only need three main ingredients: tomato, mozzarella, and basil.

Let your creativity run wild with caprese salad. You can really use any type of tomato you like, any type of mozzarella, and any type of basil. And yes, there are many variations of each.

Try using different colors of grape or cherry tomatoes with mozzarella pearls and chiffonade basil, or alternate slices of heirloom tomatoes with buffalo mozzarella slices and whole basil leaves. Get artistic and combine multiple varieties of each, and finish with drizzles of balsamic glaze and flavorful extra virgin olive oil, and of course salt and freshly cracked black pepper.

white rectangular plate with caprese salad red tomatoes mozzarella balls green basil on a black table

white rectangular plate with caprese salad red tomatoes mozzarella balls green basil on a black table

I feel silly to even include a true recipe here, so I'll just include these guidelines:
  • Pick the highest quality ingredients possible. If you don't grow your own tomatoes, go to a farmer's market and pick some out. This is where you can get creative with colors, shapes, and sizes.
  • On the topic of ingredients, the basil you get must be fresh, even if it's from out of a plastic package in the produce section. No excuses. 
  • If balsamic glaze isn't your thing, you can leave it off, but make sure you pick a good quality olive oil. You want something to tie all the flavors together.
  • 1 lb. each of tomatoes and mozzarella will serve 6-8.
  • Do not refrigerate your tomatoes.
  • Be creative!
Tuesday, June 25, 2019


Crispy Parmesan Herb Carrot Fries on a parchment paper lined baking sheet pan sitting on a marble countertop
So, you ordered a starter kit from pickedseeds.com and have a handful of herb plants thriving in your garden. Now what the heck do you do with them?

Start by plucking a few leaves of parsley, sage, thyme, and oregano, chop 'em up, and sprinkle them over

...everything. 

A great place to start is roasted potatoes. Classic. Can't really screw those up, and pretty agreeable to every palate. 

But aren't you ready to step it up?

---

Crispy Parmesan Herb Carrot Fries
by Twirlerica

Time: 50 minutes
Serves 2

Ingredients
6-8 large carrots
1 tbsp olive oil
1 tsp kosher salt
1/2 tsp black pepper
1/4 tsp granulated garlic
1/4 cup freshly grated Parmigiano Reggiano
2 sage leaves
3 parsley leaves
1 sprig thyme
4 oregano leaves
fleur de sel

Preheat oven to 375˚. Bring a large pot of salted water to a boil. Meanwhile, peel carrots and cut into 1/4"-1/2" wide strips, 3-4" long. 

Drop carrots in boiling water and cook for 3 minutes. Meanwhile, fill a large bowl halfway with ice water. Strain carrots and drop into ice water until cooled. Lay out on a clean cotton dish towel and dry. 

Line a sheet pan with parchment paper. Toss carrots in olive oil, salt, pepper, garlic, and Parmigiano Reggiano, then lay out in a single layer on the prepared pan. 

Bake for 20 minutes. Flip, and cook for 10 more minutes. Combine and chop herbs. Turn off oven, sprinkle on chopped herbs, and let the carrots sit inside the turned off oven for 10-15 minutes to continue drying out. Top with fleur de sel before serving. 

---

The Details

Need a little more info? Let's break it down into detail.

Disclaimer: This post contains affiliate links, meaning that I may make a commission if you choose to click through and make a purchase. I only link to products that I truly recommend. Thank you for your support!

What is it that makes these so freaking good?


You can put the exact same seasonings and toppings on potatoes, and they're excellent, but there's something about these carrots that's so... intriguing. I could eat them forever. Every single day. The carrots' natural sweetness sets off every other flavor: the sweetness coupled with the tang of the Parmigiano Reggiano that gets all toasty in the oven, the crunchy fleur de sel finishing salt, and the herbs added during the last bit of cooking to keep them flavorful and fresh combine to make a perfectly balanced side dish.

carrot strips on a parchment paper lined baking sheet covered in parmigano reggiano cheese next to a wood cutting board with a wusthof knife and zester

carrot strips on a parchment paper lined baking sheet covered in parmigano reggiano cheese with flecks of black pepper

Oh, and all those extra cooking steps? They make a huge difference.

Boiling them for a few minutes before baking cooks the carrots through, so the time in the oven is spent drying them out and getting those nice caramelized crispy bits. Zapping them in the ice water stops the cooking process so they don't turn out mushy (this boiling and cooling process is called blanching, and it's ideal for cooking starchy root vegetables).

Then at the end, why keep them in the oven if the oven isn't on?

As the oven cools off after cooking, the decreasing temperature is ideal for dehydration. Letting the carrots sit inside for 10-15 minutes pulls out that last bit of water that may be keeping them from getting as crispy as they could be. Also, adding the herbs for this dehydration step lets those flavors bloom and blend with the carrots without burning.

wusthof classic chef's knife with a pile of chopped herbs sitting on a wood cutting board

What the heck is fleur de sel? Can't I just use salt?

Fleur de sel is fancy, expensive french sea salt that's worth every penny. Yeah, you can use regular old sea salt or kosher salt, but you won't get that crusty crunch and the added flavor that fleur de sel brings. There's something about it that just tastes better than other salt.

Serve these carrot fries alongside burgers slathered in truffle aioli, fancy mustard, and homemade pickles on my favorite buttermilk buns. Treat yourself. You deserve it.

Crispy Parmesan Herb Carrot Fries on a parchment paper lined baking sheet pan sitting on a marble countertop

Crispy Parmesan Herb Carrot Fries on a parchment paper lined baking sheet pan

Crispy Parmesan Herb Carrot Fries on a parchment paper lined baking sheet pan sitting on a marble countertop


Monday, June 24, 2019

cheeseburger with a homemade buttermilk burger bun on a white plate with roasted red potato wedges sitting on a wood cutting board

It's the simplest question: What's your favorite food?

I used to say pizza when I was younger, but I think I only said that because everyone else said it (don't get me wrong, I LOVE pizza).

It may have been chicken parm for awhile, but I think that's only because it was the first thing I learned to make from scratch that I was super proud of (don't get me wrong, I LOVE chicken parm).

Most recently, I've gotten super excited over chicken cheesesteaks, but I wouldn't call it my favorite (don't get me wro-

...sensing a trend here?

I. Love. Food. I live for dinner. I love to cook. I'm not picky at all and will try anything, and I'll probably love it. My problem with the favorite food question is, like... how do I choose a favorite out of ALL the foods in the world? They're all my children and I love them equally but in different ways.

But I think I finally have an answer: BURGERS.

Not just any burger, though. It needs to be on a buttermilk bun.

If you're a burger fan (and who isn't?), you neeeeed these buns in your life. I'm including an option to form this into a loaf of bread in case that's what you prefer, just so you have absolutely NO excuse not to adopt this recipe and make it weekly.

With the Fourth of July coming up, buttermilk buns are the ultimate way to elevate your burger game. Serve them alongside BBQ Bacon Baked Beans, Classic Macaroni Salad, and Crispy Baked Potato Chips for best results (yep, those are all recipe links - you're welcome).

---

Buttermilk Burger Buns (or Bread) Recipe
by Twirlerica
Makes 4 oversized burger buns or 1 standard bread loaf

Ingredients
400 grams all-purpose flour
310 grams cultured buttermilk
2 1/4 teaspoons active dry yeast
6 grams sugar
8 grams salt

Mix half the flour with the buttermilk, yeast, and sugar. Cover with plastic wrap and let sit at room temperature for at least 4 hours, or up to overnight.

Add the remaining flour and salt. Knead for 8-10 minutes until smooth and elastic.

For buns or rolls: weigh entire dough ball and divide by 4. Break off pieces of dough in that divided weight, form into buns, and place on a sheet pan lined in parchment paper seam-side down. For bread: shape into a loaf, and place seam-side down in a greased and floured loaf pan to rise.
Cover with a kitchen towel and let rise for 1 hour.

Preheat oven to 375°. Brush top of buns/loaf with buttermilk. For buns/rolls: Bake for 18-20 minutes. For bread: Bake for 35-40 minutes. Remove from loaf pan/transfer from sheet pan to cooling rack and let cool for 5-10 minutes before slicing. Cool completely before storing. Freezing is recommended for storage past 2 days.

---

The Details

Need a little more info? Let's break it down into detail.


Disclaimer: This post contains affiliate links, meaning that I may make a commission if you choose to click through and make a purchase. I only link to products that I truly recommend. Thank you for your support!

The first step to success in working with yeasted dough is measuring by weight. You need a kitchen scale for this. I use this one by OXO, and it's never failed me, but any digital scale that measures in grams will work. If you've ever felt like a recipe turns out great one time, but the next time you do everything exactly the same way and it turns out like crap, chances are it's because the recipe called for x cups instead of going by weight. Weight will always be the same, but factors like temperature, humidity, and compaction can affect other forms of measurement.

Working with yeast can be intimidating if you've never tried it before, but this recipe couldn't be easier. Using the Sponge Method (mixing half the flour with the buttermilk, yeast and sugar and letting it rise) to give the yeast plenty of time and space and a pinch of sugar to wake up and bloom is the key to adding tons of flavor. This takes literally no extra hands-on time, but makes a big difference in the finished product. Give it at least 4 hours to do its thing and to produce the most flavor, but you can even let it go overnight.

Using cultured buttermilk for the hydration component gives you a slightly tart undertone, helping to bring out even more of that yeasty flavor. Cultured buttermilk is basically just fermented milk, so it plays along perfectly with yeasted dough. If you don't have buttermilk, you can use regular milk - it just won't have as much bite and won't be as soft inside. It will still be pretty delicious, though.

When kneading, you'll be able to feel once the dough gets smooth and elastic, and when it stops feeling super sticky. At that point, work it until it passes the windowpane test - pinch off a piece of dough and stretch it between your fingers. If it stretches and becomes transparent, it's ready. If it tears easily, knead for a few more minutes.

Right before baking, brush the tops with more buttermilk. This step is totally optional, but it helps to finish off the buns with a beautiful golden crust. You can use olive oil instead for a different flavor, or egg wash (1 egg beat with 1 tbsp water) for a shiny finish.

These buns freeze and defrost amazingly well. Once they're completely cool after baking, stick them in a freezer bag - they'll keep indefinitely in the freezer, but I do this even if I intend on using them within the week to keep them as fresh as possible. Once you're ready to use them, microwave for 30 seconds, flip, and microwave for another 30 seconds, then pop them in the oven at 375˚ for 5 minutes or so to get the outside nice and crusty, and to make them taste fresh baked. If you're grilling, skip the 5 minute bake and instead set them on the grill for a few minutes. I use indirect heat so they don't get too hot too quick, and let them get nice and toasty brown on each side.

cheeseburger with a homemade buttermilk burger bun on a white plate with roasted red potato wedges sitting on a wood cutting board

cheeseburger with a homemade buttermilk burger bun on a white plate with roasted red potato wedges sitting on a wood cutting board

Sunday, June 23, 2019

stack of dark chocolate brownies on a slate countertop with coffee beans

Yep. You read that correctly. Coconut Flour Cold Brew Coffee Brownies. These babies are so easy to make and they don't contain any evil, evil wheat flour.

(Kidding, wheat flour. I love you.)

My sister lives the gluten free life, so I'm always in the market for gluten free recipes to take to family functions. I hate it when even one person can't eat what I make, so I always try to cater to everyone's tastes and lifestyles. After realizing not only how quick it is to make your own coconut milk at home but also how much better it is than store-bought, I've had an influx of coconut pulp, thus an influx of coconut flour.

If you've never had coconut flour before, you may think it'll taste like... well, coconuts. It really doesn't at all. Since it's a byproduct of coconut milk, all of the flavor gets extracted into the milk, leaving behind only the fibrous part of the pulp, which then gets dehydrated and ground into flour (read the entire process here!). The resulting flour is super light and absorbent compared to wheat flour, so you can use way less of it in recipes and balance it out with an extra egg and some extra liquid-

...what better for that than cold brew coffee?

stack of dark chocolate brownies on a slate countertop with coffee beans

The result is a super light, super moist brownie with deep, dark chocolate flavor. You can't eat just one. It's not physically possible. I had to eat three to make sure the flavor was perfect, of course. I offered some to Sam but he declined (he's not always that into sweets). I made them the night before I took the final photos and when I woke up the next morning, they'd mysteriously dwindled down to seven...

---

Coconut Flour Cold Brew Coffee Brownies
by Twirlerica

Time: 45 minutes
Makes 16 brownies

Ingredients
1/2 cup coconut flour
1/2 cup dutch process cocoa powder
1/2 cup sugar
3 eggs
1/4 cup cold brew coffee concentrate (or brewed espresso)
1/2 cup melted butter
1/2 tsp vanilla extract
1/4 tsp salt
1/4 cup mini chocolate chips (optional)

Preheat oven to 350˚. Grease an 8x8 baking dish and line the bottom with parchment paper, then grease the top of the parchment paper as well. Mix all ingredients except chocolate chips and spread in prepared dish. Top with chocolate chips.

Bake for 25-30 minutes, until a toothpick inserted into the center comes out clean. Cool completely before cutting into 2" squares.

---

The Details

Need a little more info? Let's break it down into detail.

Disclaimer: This post contains affiliate links, meaning that I may make a commission if you choose to click through and make a purchase. I only link to products that I truly recommend. Thank you for your support!

Isn't this such a simple recipe? One bowl, and you don't even need a special mixer (I use a fork to mix). If you don't have a handy KitchenAid cold brew coffeemaker, there are so many other great options for at-home cold brewing. Before I had my KitchenAid maker, I made my own cold brew coffee bags out of coffee filters and string (see my full tutorial here!) and they even make pitchers with filtering mechanisms built-in. Any of these methods produce the same results, so pick whichever works best for you. A quick alternative is to use espresso powder if you don't have the 24+ hours to wait for cold brew.

You can use regular cocoa powder for this recipe, but dutch process is best. I never even knew it was a thing until I started watching baking shows on the Food Network and it seems like that's all the use... but I totally get it. It makes everything so much richer. It's cocoa powder that's been washed in a potassium solution that neutralizes its acidity and gives it a darker color - think semisweet chocolate vs. dark chocolate.

For toppings, you can be as creative as you want. Swirl in some caramel and top with sea salt, combine pecans or walnuts with the chocolate chips, or bring it full-circle and top with sweetened coconut flakes!

stack of dark chocolate brownies on a slate countertop with coffee beans

stack of dark chocolate brownies on a slate countertop with mini chocolate chips

stack of dark chocolate brownies on a slate countertop with coffee beans

Saturday, June 22, 2019

coconut flour spilling out of a stainless steel measuring cup on a wood cutting board with an open cookbook on the side

We've mastered homemade coconut milk (isn't it insane how good it is?!), now what do we do with all that pulp?

coconut pulp on a parchment paper lined baking sheet

Preheat your oven to 250˚. Spread the pulp in a single layer onto a parchment-lined sheet pan.

coconut pulp on a parchment paper lined baking sheet

Dehydrate for 30-40 minutes until completely dry, checking it after 30 minutes. Let it go to 40 minutes to give the flour a slightly toasted flavor (note the color difference in the left and right batches below).

dried coconut flour on a parchment paper lined baking sheet

If you have any clumps, run it through a coffee grinder or simply crush them between your fingers.

coconut flour in a coffee grinder

Let the flour cool completely before storing in an airtight container at room temperature.

coconut flour spilling out of a stainless steel measuring cup on a wood cutting board with an open cookbook on the side

Coconut flour is considerably drier than wheat flour, so look for coconut flour-specific recipes for best results (if you're feeling brave, substitute 1/4 cup coconut flour for every cup of wheat flour, plus an additional egg). 
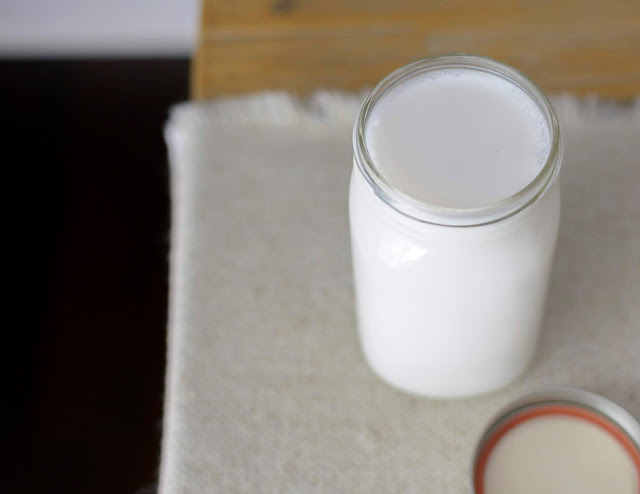
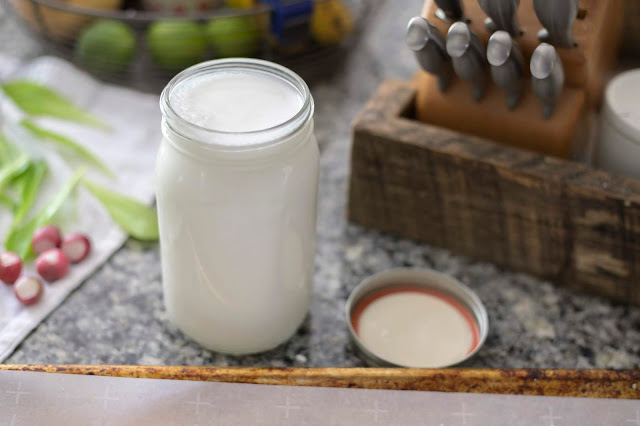
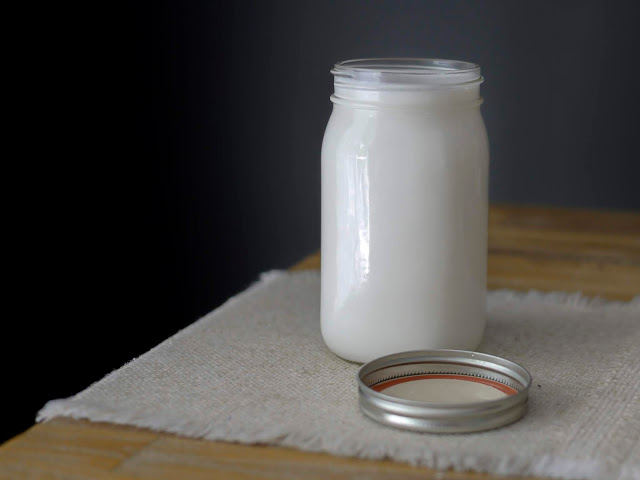
coconut milk in a mason jar sitting on a jute table runner on a wood table with a black background

Making homemade coconut milk could not be easier. You don't need any special equipment other than a blender, and the resulting flavor is SO MUCH BETTER than anything you'll ever buy in the store.

Disclaimer: This post contains affiliate links, meaning that I may make a commission if you choose to click through and make a purchase. I only link to products that I truly recommend. Thank you for your support!

Now, of course you can be super fancy and buy a real coconut, crack 'er open, and make coconut milk from the meat. But my preferred coconut for ease of use is unsweetened pre-shredded coconut. And when making something with such few ingredients (this is literally just coconut and water), you have to source the highest quality ingredients as possible. Look for keywords like organic, non-gmo coconut, with no preservatives or additives; keep in mind that anything in that coconut will go directly into the final product.

let's do organic shredded coconut inside the bag


So, we've covered the blender, the ingredients... what else?

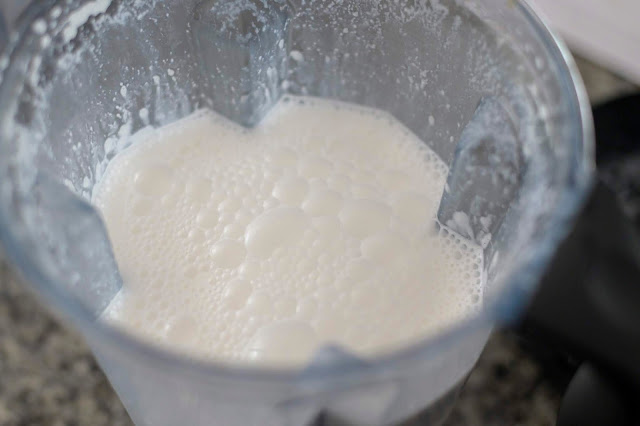
blended coconut milk before straining in a vitamix blender


You'll need something to separate the liquid from the pulp. You can buy nut milk bags - these are reusable bags made from materials like mesh, cotton, linen, or hemp that allow the liquid to pass through while keeping the pulp inside, and they're relatively inexpensive. The only issue I have with nut milk bags is that they're a single function product.

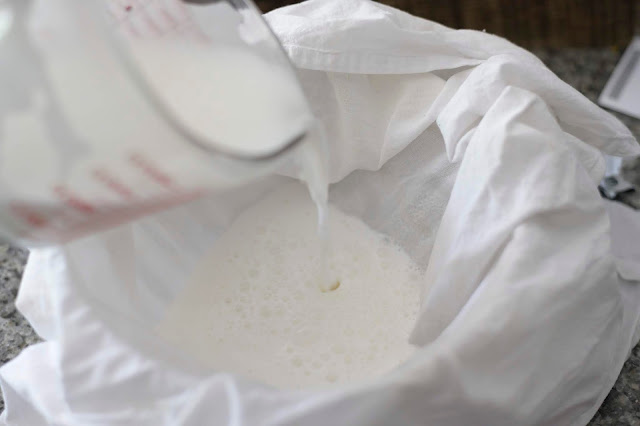
coconut milk being poured into a white flour sack towel over a bowl for straining


I like to use flour sack dish towels to filter my coconut milk. Like nut milk bags, they're made from cotton and function in the same way, but since they're not sewn into a bag shape with a drawstring, you can use them for other things. I use mine to dry dishes, cover rising dough, even to dry salad greens. They get better and better the more you use them, and they're so easy to toss in the wash.

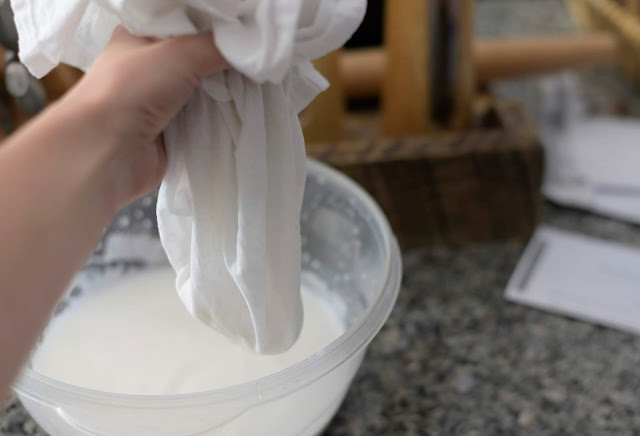
coconut milk being strained in a white flour sack towel hanging over a bowl


Alright, that's about enough chatter. This is the easiest recipe ever. 

---

Homemade Coconut Milk
by Twirlerica

Time: 5-10 minutes
Makes 1 quart

Ingredients
1 1/2 cups unsweetened coconut shreds or flakes
4 cups hot water

Blend ingredients on high for 2-3 minutes. Filter through a cotton towel or sack, squeezing to release as much liquid as possible. Cover and keep refrigerated. Use within 3-4 days. 

---


homemade coconut milk in a mason jar sitting on a jute table runner on a wood table with a black background

coconut milk in a mason jar on a grey granite countertop with colorful produce in the background and a baking sheet in the foreground

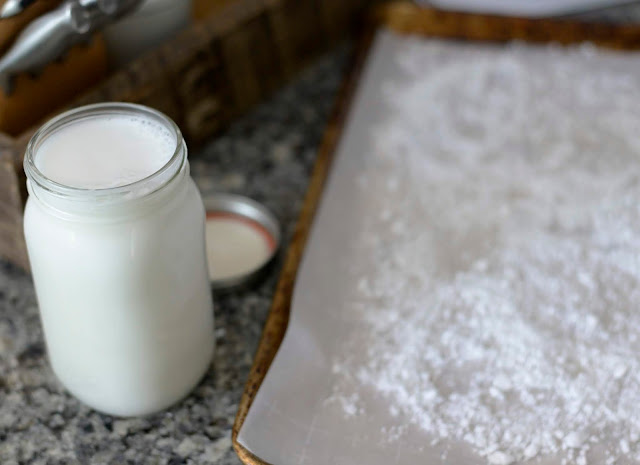
coconut milk in a mason jar with pulp sitting on a parchment paper lined baking sheet on a grey granite countertop

And don't throw that pulp away... turn it into homemade coconut flour!

Sunday, March 17, 2019

sliced loaf of banana bread sitting on a navy and white striped towel on a wood table


There's something about certain smells that instantly transport you back to moments in time. Sam and I moved into our house a a few years ago in June. It's about a mile up the road from my grandparents' house, where my sister and I spent countless summer days. I'm not sure if it's the wild violets, the huge patches of clover, the type of grass we have... maybe a combination of it all. Whatever it is, all I have to do is stand in our backyard and close my eyes, take a breath, and I'm instantly a mile and 20 years away and it's July, summer break, and I'm sitting on the bench under the tree with my grandma.

The same thing happens to me with the smell of ripe bananas. My grandparents always seemed to have a bunch of ripe bananas sitting in their kitchen, and all it takes is one waft of overripe bananas waiting to be made into bread and I'm back sitting at the kitchen table playing board games with my grandma and sister, with my grandpa sitting a few feet away in his recliner in the living room, scouring the paper for grocery deals and coupons (he was the original extreme couponer).

Couple that nostalgia factor with the fact that this banana bread recipe is simply perfect, and we've got a winner.

---

The Best Banana Bread Recipe
by Twirlerica

Time: 1 Hour 25 Minutes
Makes 1 Loaf

Ingredients
1 cup sugar
1⁄2 cup unsalted butter, room temperature
2 large eggs, room temperature
1 teaspoon vanilla
3 overripe bananas
2 cups flour
1 teaspoon baking soda
1 teaspoon salt
1⁄2 cup chopped walnuts, optional

Preheat oven to 350 ̊. Butter a 9x5x3” loaf pan.

Cream sugar and butter in a large mixing bowl until light and fluffy. Add the eggs one at a time, beating well after each addition, then add vanilla.

In a small bowl, mash the bananas with a fork. In another bowl, mix flour, baking soda and salt. Add the bananas to the butter mixture and stir until combined. Add dry ingredients, mixing by hand just until flour disappears.

Pour batter into prepared pan and bake 55-65 minutes, until a toothpick inserted in the center comes out clean. Cool in pan on a cooling rack for 15 minutes, then remove bread from pan and cool completely before slicing. Wrap tightly and store at room temperature for 3-5 days.

---

The Details

Need a little more info? Let's break it down into detail.

Disclaimer: This post contains affiliate links, meaning that I may make a commission if you choose to click through and make a purchase. I only link to products that I truly recommend. Thank you for your support!


Remember when I ripped apart my pantry? Well, I found four opened bags of walnuts.

Four. Opened. Bags. Of. Walnuts.

I made this recipe without nuts the time I took the photos because I didn't think I had any. Lol. It's great either way, though.

sliced loaf of banana bread sitting on a navy and white striped towel on a wood table


An important note: both the butter and eggs need to be at room temperature. If the butter is at room temperature and you add cold eggs to it, the butter will turn into chunks that may hold onto ingredients, giving you pockets of egg yolk or dry flour once you slice into the bread. Mixing everything at room temp will yield a nice smooth batter, with everything evenly distributed.

For equipment, I always use a nonstick loaf pan, but a glass bread pan will work just fine as well. You can use a hand mixer or stand mixer if you'd like, but I usually just mix this recipe by hand. The only part you'll want to use a mixer for anyway is for creaming the butter, sugar, eggs and vanilla. Everything else will be done by hand to prevent overmixing the batter.

Wait to make this recipe until your bananas are super dark - not just ripe, but to the point where they have more black spots than yellow. This will give you the best banana flavor and sweetness. To speed up the ripening process, place bananas in a brown paper bag. The ethylene they release will build up and cause them to ripen faster. If you have a ripe avocado, apple, or pear, place that in the bag with the bananas. That will get you there in the quickest time.

This bread is perfect as is, but add some softened butter and a pinch of salt and thank me later.

sliced loaf of banana bread sitting on a navy and white striped towel on a wood table

homemade potato and cheese pierogi on a white rectangular plate on a wood table


Yeah, Mrs. T's is good. But have you ever had a homemade pierogi? Where the outside is browned and crispy with a touch of salt, covered in sautéed onions, and filled with savory, cheesy potatoes? If you haven't, you're missing out. But, have no fear, nirvana is but an hour away.

---

Homemade Potato and Cheese Pierogi
by Twirlerica

Time: 1 Hour
Makes: 24-30 Pierogi

Ingredients

Dough
3 1⁄2 cups flour
1 egg
1⁄2 teaspoon salt
1 cup water

Filling and Topping
2 cups mashed potatoes
1⁄2 cup shredded cheddar cheese
1 medium onion
3 tablespoons butter, divided

Combine flour, egg, and salt. Add water gradually, using only as much is needed to form a dough ball. Knead for 5-10 minutes until smooth, then cover and let rest for 20 minutes.

Prepare filling and topping while dough is resting. Reheat mashed potatoes if necessary, then mix in cheese. Set aside. Sweat sliced onion in 1 tablespoon butter over medium-low heat until caramelized.
Work with half the dough at a time. Roll out to 1/8” thickness. Cut out a circle of dough using a drinking glass or round biscuit cutter. Place 1 tablespoon mashed potato mixture in the center, Dip fingertip in water and run along the edge, then press to seal in a semi-circle. Use the tines of a fork to create a crimped edge. Repeat until all dough is used, re- rolling as necessary (discard dough if it starts to dry out).

Drop pierogi into a large pot of boiling water, cooking 2-3 minutes until dough is cooked through (pierogi will float and feel noticeably lighter when done). Melt remaining 2 tablespoons butter and pan fry in batches until golden brown - 1-2 minutes per side. Salt immediately after removing from pan. Top with caramelized onions and serve with sour cream.

---

The Details

Need a little more info? Let's break it down into detail.

Disclaimer: This post contains affiliate links, meaning that I may make a commission if you choose to click through and make a purchase. I only link to products that I truly recommend. Thank you for your support!


white rectangular plate with homemade pierogi and sour cream on a wood table with a pink miniature rose in a small vase


Pierogi was my first foray into fresh pasta dough making. The dough recipe differs from the dough recipe I use now in that it contains water (the moisture in the dough recipe I use for everything else comes completely from the eggs), but the process is essentially the same. When you combine the flour, salt, and egg, it will be hard to mix. Add the water gradually, adding just enough to make a nice smooth dough. This amount will differ based on humidity and temperature, but I typically use anywhere from 3/4 to the entire cup.

When caramelizing onions, the key is medium-low heat and plenty of patience. We're not sautéing (higher heat, constant movement), we're "sweating" the onions. The goal is to bring out the natural sugars of the onions, which is where the "caramel" part comes into play. The brown color of caramelized onions comes from the sugars caramelizing. Other recipes may say this can be accomplished in 5-7 minutes, but the best caramelized onions take about 30 minutes of low-and-slow patience.

white rectangular plate with homemade pierogi and sour cream on a wood table with a pink miniature rose in a small vase


This recipe is perfect for using up leftovers like mashed potatoes, but you can also fill them with ground meat, sauerkraut, mushrooms, or anything else you have that you want to use up.

Pierogi are essentially vessels for whatever filling you like. Try mixing it up and making sweet pierogi from with sweetened farmers cheese or ricotta, and topping with berry compote and whipped cream or a sprinkle of powdered sugar. You'll obviously omit the onions in that case, but don't you dare skip that pan-fry step.

Why is it that every baked potato chip recipe out there promises "chips", but what you get are sad, floppy potato slices, or hard discs that taste like what you find in a box of dry scalloped potatoes (you know you swiped one from the box when you were a kid when your mom wasn't looking, too), or even worse, a combination of the two?

In my quest to make everything from scratch, I knew there had to be a way to make real, crispy potato chips in the oven. And so, after a lot of thinking and a little trial and error, I found my perfect recipe.

---

Crispy Baked Potato Chips Recipe
by Twirlerica

Time: 1 Hour 10 Minutes
Serves: 2-4

Ingredients
4 russet potatoes
2 teaspoons olive oil
1 1⁄2 teaspoons salt
1⁄2 teaspoon pepper

Preheat oven to 350 ̊. Line a sheet pan with parchment paper. Bring a large pot of salted water to a rapid boil. Meanwhile, peel potatoes, and carefully slice into 1/8” slices using a mandolin. Let sit in a bowl of cold water while water comes to a boil.

Drain potatoes and drop into boiling water for 2-3 minutes. Drain, and immediately place in a large bowl of ice water. Let sit for 5-10 minutes, then drain.

Lay out blanched potato slices on paper towels to dry for 5 minutes, blotting if necessary. Toss in oil and salt, then lay out in a single layer on prepared pan, using two pans if necessary (do not let edges overlap). Sprinkle with pepper.

Bake at 350 ̊ for 25 minutes, or until edges just start to brown. Turn off oven and let sit inside for 15-20 minutes, or until completely dried out. Finish with more salt to taste.

---

The Details

Need a little more info? Let's break it down into detail.

Disclaimer: This post contains affiliate links, meaning that I may make a commission if you choose to click through and make a purchase. I only link to products that I truly recommend. Thank you for your support!


So, why does this recipe work?

Adding the blanching step serves two purposes: 1. It jump-starts the cooking process, and 2. it pulls excess starch. That starch is what hinders crispiness, and gives dry potatoes that weird, plastic-y hardness. You may even notice a gel-like substance in the bottom of the bowl of ice water after letting the potatoes soak - that's starch, and that's a good thing.

The other key here is significantly dropping the oven temperature from a typical baked potato chip recipe and extending the cooking time. 350˚ is plenty to finish cooking the chips all the way through (especially since we boiled them for a couple minutes to start), and it will help them cook more evenly. The 15-20 minute dry-out time inside the turned-off oven will pull any remaining moisture from the chips and give them a nice golden color.

For seasoning, salt is really all you need, but these are essentially a blank canvas for whatever flavors you like. Try tossing in a tablespoon of chopped fresh herbs, black pepper, garlic powder, even grated parmesan cheese, or make your own barbecue seasoning with a blend of smoked paprika, brown sugar, chili powder, garlic powder, onion powder, cayenne, salt and pepper.
wood cutting board with wusthof knives and fresh herbs on top with cream of mushroom soup in bottom left and top right corner


Unpopular opinion: Condensed soup is horrifying.

Listen, I get it. There's nothing easier than opening a can and plopping that jiggly grey mass into a recipe to add salt and flavor and those little squeaky chunks of mushroom-ish bits. But I promise, whatever recipe you're using it for can be so much better if you take a few extra steps to make your own cream of mushroom soup (plus, this is not only edible on its own, but freaking delicious).

Note that this recipe is for prepared soup, not for condensed, and it makes a ton. If you need it in place of a 10.5 oz of condensed soup for a recipe, reduce the amount of milk and chicken stock by half and use 1 1/4 cups in your recipe. Reconstitute the rest with 1 1/2 cups milk or stock.

---

Scratch Made Cream of Mushroom Soup
by Twirlerica

Time: 1 Hour 15 Minutes
Serves: 4

Ingredients
12 oz. cremini mushrooms
1 large yellow onion
1 teaspoon olive oil
4 tablespoons butter
1/4 cup flour
2 cups milk
2 cups chicken stock
2 tablespoons heavy cream
1⁄4 teaspoon plus 1 1⁄2 teaspoons salt, divided
1⁄4 teaspoon pepper
1⁄4 teaspoon garlic powder

fresh parsley fresh thyme

Preheat oven to 400 ̊. Clean mushrooms and cut into 1/2" pieces. Toss in olive oil and sprinkle with 1⁄4 teaspoon salt. Spread in a single layer on a sheet pan lined in foil. Coat whole onion in olive oil and salt and place on the same pan. Roast for 35 minutes until mushrooms are dried and golden, and onion is tender. Once onion is cool enough to handle, discard outer layer and cut the rest into 1⁄4” dice.

Melt butter in Dutch oven over medium heat. Whisk in flour and cook for a minute, then gradually whisk in milk. Add warmed chicken stock, mushrooms, and onions. Salt to taste. Bring to boil, cover and reduce to simmer. Cook for 30 minutes.

Add heavy cream and cook for 2-3 minutes until soup comes back to a simmer. Garnish with chopped parsley and thyme, and a drizzle of olive oil or cream.

---

The Details

Need a little more info? Let's break it down into detail. 

Disclaimer: This post contains affiliate links, meaning that I may make a commission if you choose to click through and make a purchase. I only link to products that I truly recommend. Thank you for your support!

cream of mushroom soup in a white bowl and a crystal cream pitcher with a wood cutting board in the background


An enameled cast iron dutch oven is the ideal vessel to make this soup. I got a great deal on a Le Creuset from Burlington (check out that entire haul here!), but the Lodge equivalent you can get at a fraction of the cost works just the same. The Chrissy Teigen 5 qt. dutch oven from Target is a cute option if you want something more classic looking. Make sure you have a wooden spoon for stirring and scraping when using an enameled dutch oven, and a silicone whisk for adding the liquid into the roux (butter+flour mixture, but you knew that) to prevent scratching or damaging the enamel.  

This recipe takes it a step further and calls for roasting the mushrooms and onion first to dry out and toast the mushrooms and soften the onion, then giving a good 30 minute simmer time to rehydrate the mushrooms in the soup for extra flavor. But if you're in a time crunch, feel free to skip that part and instead saute them for a few minutes in the oil and butter until the onions are softened, then sprinkle the flour over top and stir until it absorbs all the fat and add the milk to that. 

Speaking of adding the milk, add veeeery gradually to prevent lumps. Start with about a half cup - it will immediately thicken and turn into a paste. Add another half cup until completely incorporated, and repeat until all liquid is added. 

Oh, and feel free to substitute fresh garlic for the garlic powder. Add a minced clove to the melted butter just before adding the flour for the roux. The time it takes for the flour to cook into the butter is perfect for the garlic to soften and get fragrant without burning. 

wood cutting board with wusthof knives and fresh herbs on top with cream of mushroom soup and a sheet pan of croutons

Garnishes are the best part of this soup. I like using a drizzle of flavorful olive oil, but how good would a few drops of truffle oil be? An extra swoosh of heavy cream added to each bowl lets everyone know, hey, there's cream in here, plus it adds some fresh dairy flavor. Fresh herbs are a must. I like parsley and thyme to bring out the earthy mushroom flavor and balance the garlic. 

For homemade croutons, cut leftover bread or buns into 1" cubes and place in a single layer on a parchment lined sheet pan. Dehydrate in a 250˚ oven for 20 minutes, stirring after 10 minutes, until dry and toasty. They make the perfect textural compliment to the creamy soup. 

Wednesday, March 13, 2019

a small pantry organized with mason jars and baskets next to a samsung fridge

Pinterest got me again. One minute I'm casually pinning photos of organized pantries, the next minute I'm placing a Target order for baskets and mason jars. This entire project took me about 4 hours (the marble contact paper taking about 3 of it) and cost less than $150. Prepare yourself mentally before scrolling down. The before pictures are... scary.

Before

small pantry before being organized

small pantry before being organized

 After 

small pantry organized with mason jars and baskets lined with marble shelf paper

small pantry organized with mason jars and baskets lined with marble shelf paper

small pantry organized with mason jars and baskets lined with marble shelf paper

Products Used 

Disclaimer: This post contains affiliate links, meaning that I may make a commission if you choose to click through and make a purchase. I only link to products that I truly recommend. Thank you for your support!

baking essentials organized in a basket on marble paper shelf with cookbooks on side
Threshold 6"x12" Wicker Folio Bin - Dark Global Brown
I LOVE these baskets. I have two matching trays from the same collection that fit perfectly on our TV stand in the living room. And since our kitchen opens to our living room, I love the fact that they all coordinate. This basket sits on the top shelf and hides a multitude of baking supplies from sprinkles and piping tips to my flour sifter and cupcake liners - all of those little things that if kept visible make the space look cluttered.
I have enough space behind this basket to store things like extra empty jars, and space on the side to store two of my favorite cookbooks that I can't recommend enough: Magnolia Table by Joanna Gaines and Making Artisan Cheesecake by Melanie Underwood. 

small pantry organized with mason jars and baskets on marble shelf paper
Ball 12ct 16oz Glass Mason Jar with Lid and Band - Wide Mouth
The next shelf is my baking shelf. It fits both pint and quart-sized mason jars, so I have all of my ingredients like baking chips, nuts, coconut, and raisins that come in small quantities in the pints, and assorted flours and powdered sugar in the quarts. 

small pantry organized with mason jars and baskets on shelves lined in marble paper
Threshold 4.75"x6.5" Wicker Media Bin Dark Brown
I chose to get smooth-sided mason jars with wide mouth openings to make them feel more canister-like, and to make it easier to scoop things out of them. I wish the pint jars came in the smooth-sided option because it's so much easier to fit a label on the smooth glass. The media bin is perfect to store bags of chips and jars of peanut butter - things that are staying in their own packaging. Again, it gives a cleaner look and it also makes it easy to just pull the whole basket out and grab a snack vs. trying to move things aside to find what you're looking for.   

oils and vinegars organized on a turntable lazy susan in a small pantry lined with marble shelf paper
Made by Design Kitchen Cabinet Turntable White
This isn't the cutest turntable I've ever seen, but it is super functional and ideal for breakable glass bottles of potent liquid. It has a grippy pad that the bottles sit on that would be easy to wipe down if anything ever leaked or spilled, and I like the lip it has on the sides to prevent things from tipping. They also have a 15" version if you have more space, but I like having the side open to store my Chrissy Teigen mini cast-iron dutch ovens.  

baking pans and cooling racks in a white steel organizer in a small pantry lined with marble shelf paper
Made by Design Kitchen Cabinet Pan Organizer White
I was actually shocked at how nice this piece was when I opened it. I was fully expecting it to be plastic, but it's actually enameled steel, so it's super sturdy and high quality. Plus it was so cheap, and made the biggest difference! I used to find it impossible to grab a cooling rack when I had everything stacked on top of each other (can't even tell you how many times I ripped everything off the shelf in a fit of rage), but now every piece has a place. 

flour and basmati rice in gallon sized latch lid mason jars on marble shelf paper in a small pantry
Bormioli Rocco 135.25oz Fido Clamp Canning Jar (2)
Have you discovered the magic of basmati rice yet? I have, and I bought a 10 lb. bag of it. Even though it came in a resealable bag, I still felt sliiiightly worried every time I opened it that there would be a family of mice living in it... I don't know why. Not anymore! These jars are made in Italy and again, really shockingly nice quality for the price. Also, they do fit a 5 lb. bag of flour. 

potatoes and onions in a pewter and copper wire basket with cereal in oxo pops containers in a small pantry lined with marble paper
HOW CUTE IS THIS BASKET? I feel like a friendly milk delivery man just dropped it off on my doorstep. Honestly, if you have a walk-in pantry and don't get yourself multiples of this basket to store all your room temperature produce, I am personally mad at you.
I feel like these cereal containers are a gateway drug into organization. Whose parent didn't have these growing up? I ordered two of these and a 4 qt. rectangular container from Amazon, then was at Home Goods a week later and saw the same containers for half the price. Very rude. So, if you have a Home Goods in your area and aren't impatiently shopping at midnight, I highly recommend you check there first for deals.

Duck Brand Peel & Stick Adhesive Laminate - White Marble, 20 in. x 15 ft. (4)
Finally, the biggest difference to the overall look and feel of the cabinet was covering the entire thing in marble contact paper. I originally only did the shelves, but covering the yellow walls brought it all together. A few tips if you decide to do the same:
-Wipe absolutely all debris before applying. Even one stray crumb or strand of hair will make a big ol' bubble that will never go away
-Measure twice, cut once. Add an extra 1/4" along each side to ensure the corners get covered.
-Peel the paper backing off the top edge and get the top lined up first, then use a sturdy, flat-edged instrument to smooth out all bubbles as you slowly peel the rest of the paper off. A cheap plastic putty knife will be the absolute best few dollars you can spend if you decide to go this route.
-Work SLOWLY. You can peel off and adjust, but it makes it much more difficult to get it perfect if the paper is peeled off.
-Did I mention go slow?

---

After about two weeks of living with this organized pantry, I can honestly say it was life changing. Next up, I desperately need to organize everything else in my kitchen. My spice cabinet could use some love, and my pots and pans cabinet is... embarrassing. So is the hall closet.

I see a lot of marble paper in my future.